Replace EtherCAT Drive for AZ or EL
Resources
Check electrical schematics for details on the ethercat connections
Definitions
Faulty drive: The drive that has the main issue, comms or power related.
Previous drive: Is the drive that is set before the faulty one, closer to the Master’s end.
Next drive: Is the drive that is set after the faulty one, far away from the master’s end.
M12: EtherCAT connection implemented on the Drives’end.
RJ45: EtherCAT connection used at the MAster end (PXI or Support Computer)
TMA Support Computer: Is the computer used for any engineering work on TMA and its subsystems. This PC was originally the Black one located nearby the TMA Cabinet (Tekniker ownership) or a new one that will be installed inside the cabinet.
Procedure
1. Getting the faulty drive configurations
The current faulty drive configuration file must be downloaded from the faulty drive using the PHASE Support PC. There will be a PHASE procedure for this soon. If the PHASE procedure has not been delivered yet, contact Marco Rossi, from Phase for this.
2. Replace the faulty drive by the new one physically
Note that if the faulty drive is bypassed the ethercat wires will not be disconnected/connected in this step.
Remove the connections from the faulty one
Take out the faulty drive
Put in the spare drive
Connect all the wires from the faulty one:
CAN Bus
DC Power bus
PT100
Ethercat only if no bypass is in place
3. Configuring the spare/new drive
The recovered configuration file from the faulty drive must be uploaded to the new/spare drive. This could be done following the PHASE procedure, but if the procedure has not been delivered yet, please contact Marco Rossi from Phase for this.
4. Recovering the original bus line (hardware, only if a bypass was in place)
Once the new drive has been set and configured, the next step is to remove the bypass cable. Once this is done the original line will be connected, with a spare drive in instead the faulty one.
5. Software preliminary verification (using TwinCAT)
Access to the TMA Support PC / Tekniker L8 PC remotely or in person.
Open the browser for access the EtherCAT switch.
Set the EtherCAT line from the PXI to the computer.
Open the TwinCAT application with the PhaseDrive project, details on how to do this are here
Enable the faulty drive on the left tree section (right click on it -> Disable)
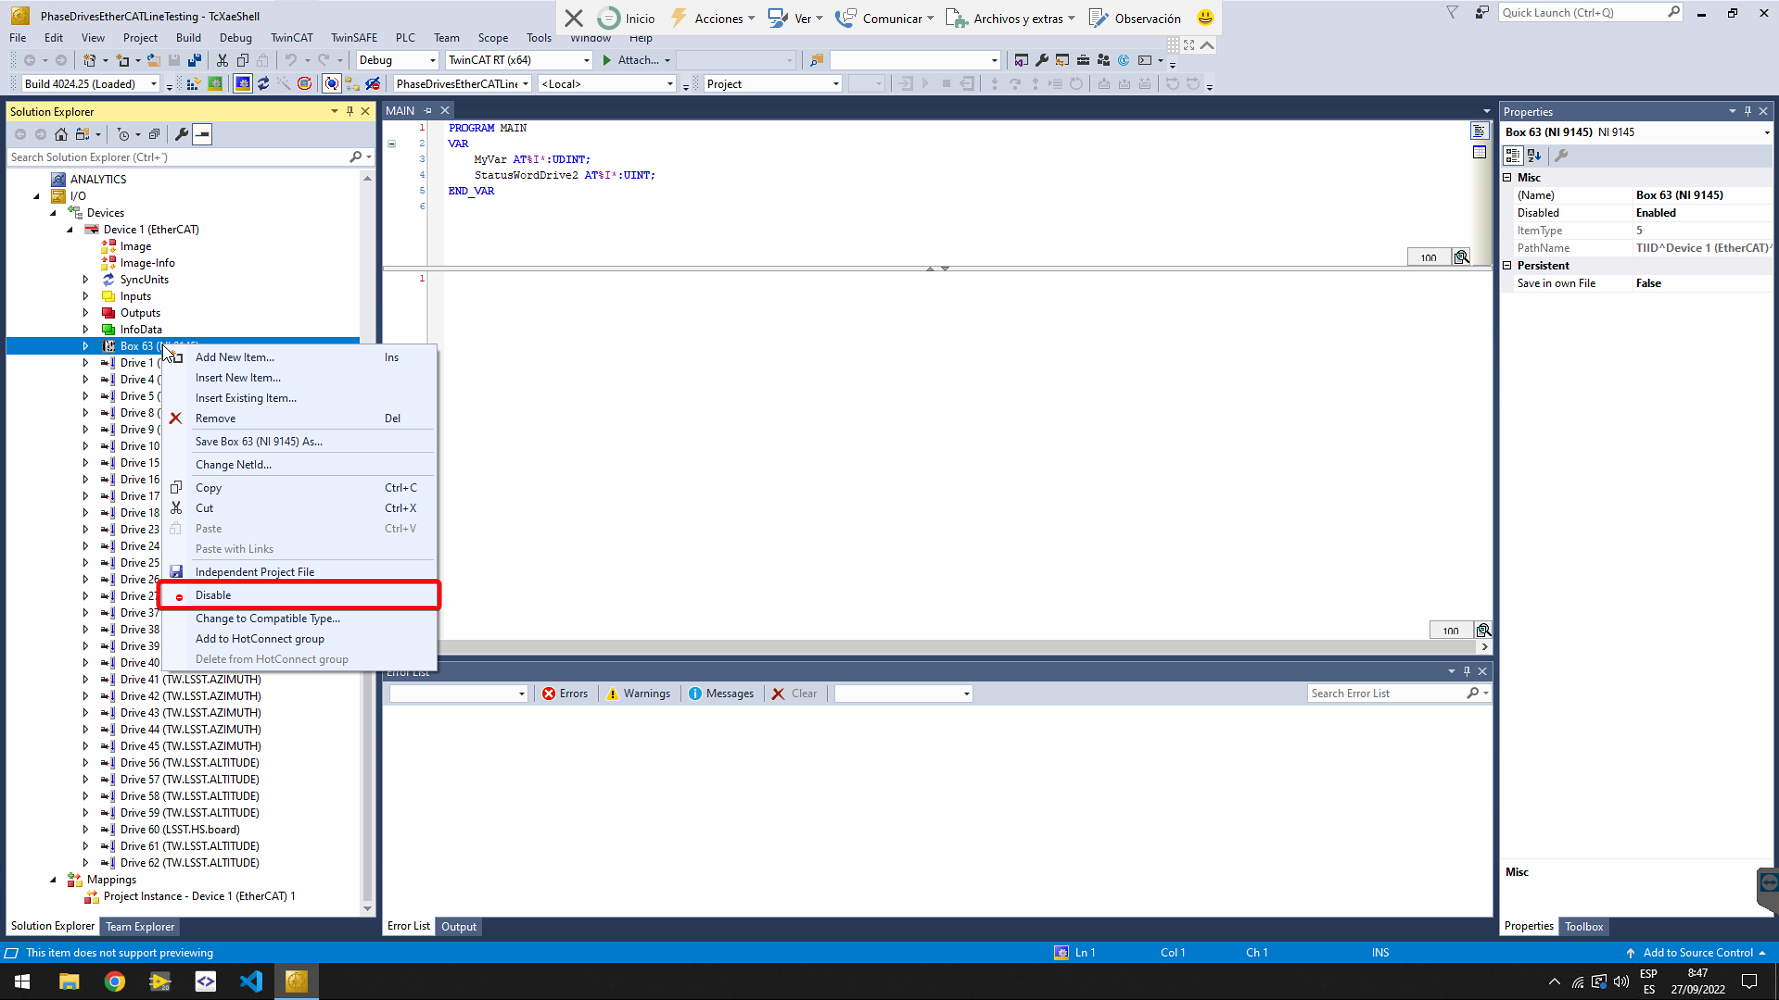
Some errors are expected due to the Serial Number mismatching in between the faulty drive and the new one. But the drives should all be in OP at this point
Set TwinCAT to Config Mode.
Set back the EtherCAT switch to be connected to the PXI.
6. Labview project updates
Once the new drive is mounted and electrically connected to the rest of the EtherCAT line, the steps listed below must be followed:
Open the
MainAxesPXI.lvprojLabVIEW project, located here. It should look something like this, see image below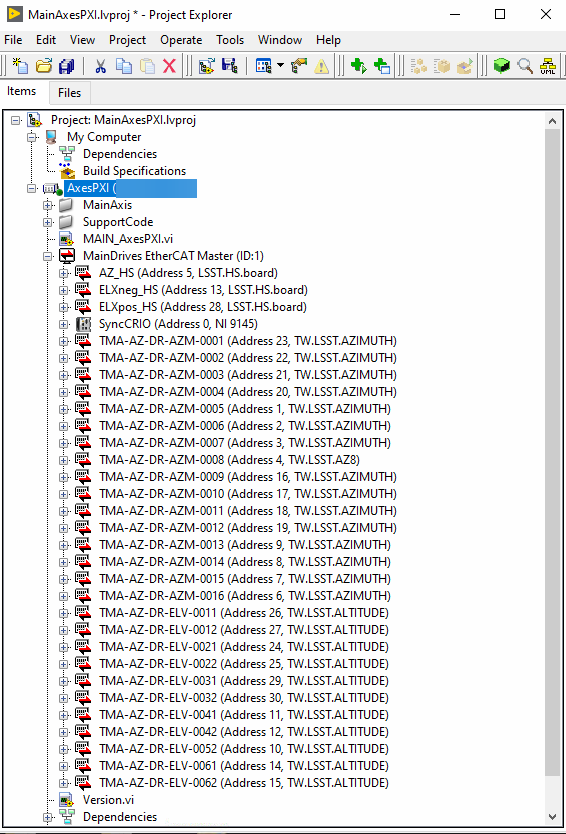
Delete the replaced drive from the project
Copy the name of the replaced drive and note it somewhere, it will be required in a future step
Select the replaced drive in teh LabVIEW project and press supr key on the keyboard
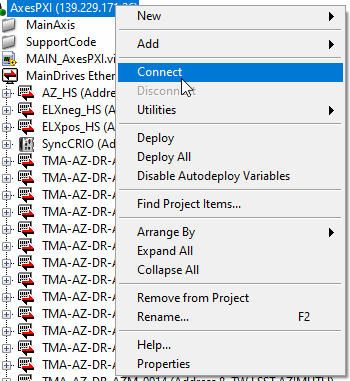
Connect to the AXES PXI
Make sure that the IP from the project corresponds to the one for the AXES PXI on the TMA.
Add the new drive to the LabVIEW project
Right click on the ethercat master,
MainDrives EtherCAT Master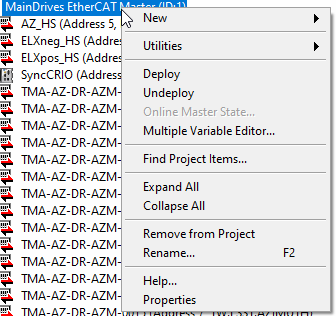
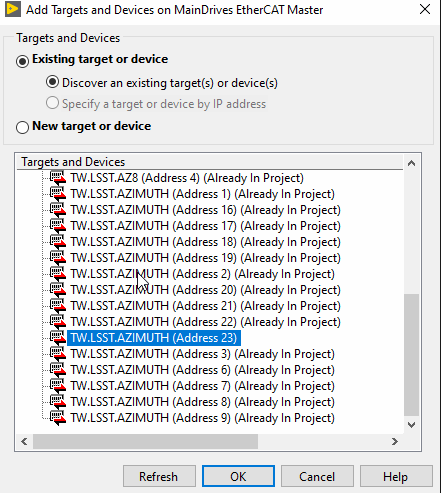
Select New > Targets and Devices…

On the new window, called Add Targets and Devices, expand the ethercat master and select the slave that is missing in the project and press OK. This will add the device to the project, but with an incorrect name.
Rename the newly added
Deviceto the stored name from the delete slave step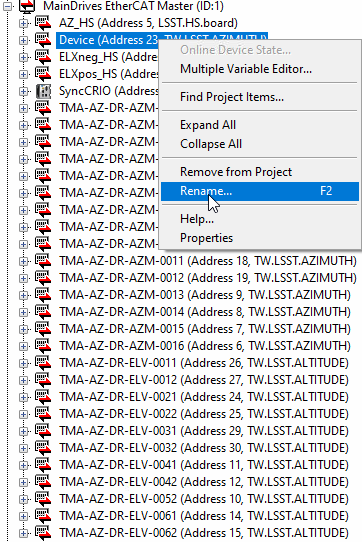
Deploy the master configuration onto the PXI, to include the new drive
Right click on the
MainDrives EtherCAT Masterand select Deploy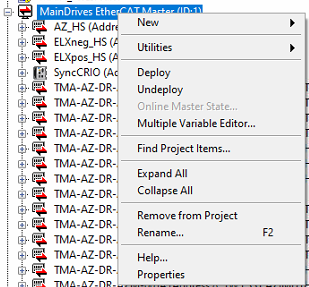
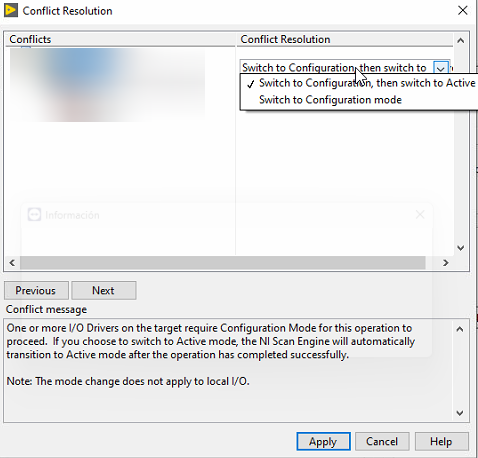
When deploying, it si likely that a conflict resolution pop up will appear. Before clicking apply, make sure the conflict solution is set to an option that leaves the scan engine in active as the last step.
Check the serial number from the new drive and the data stored in the project
Right click on the new drive and select
Online Device State...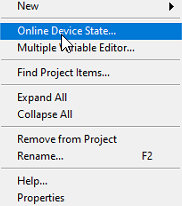
On the new window, go to Parameters and expand the Identity Object.
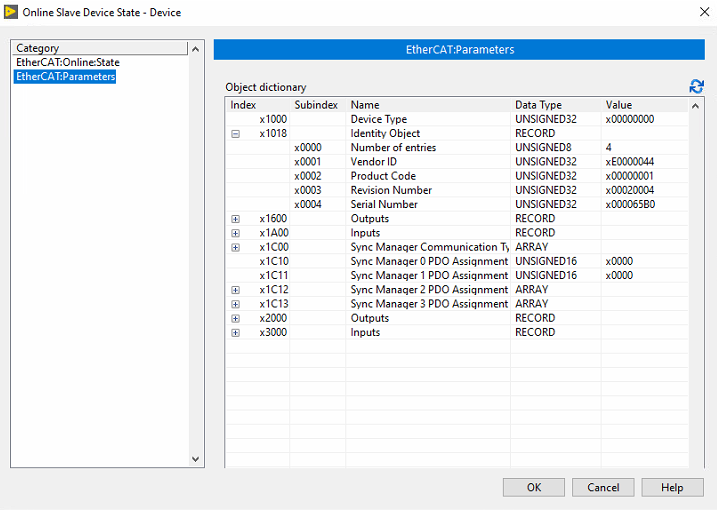
Note the Revision Number and Serial Number
Close the pop up window
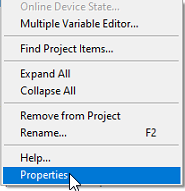
On the LabVIEW project, right click on the new drive and select Properties
On the new window, check that the contents of the General view matches the previously noted Revision Number and Serial Number
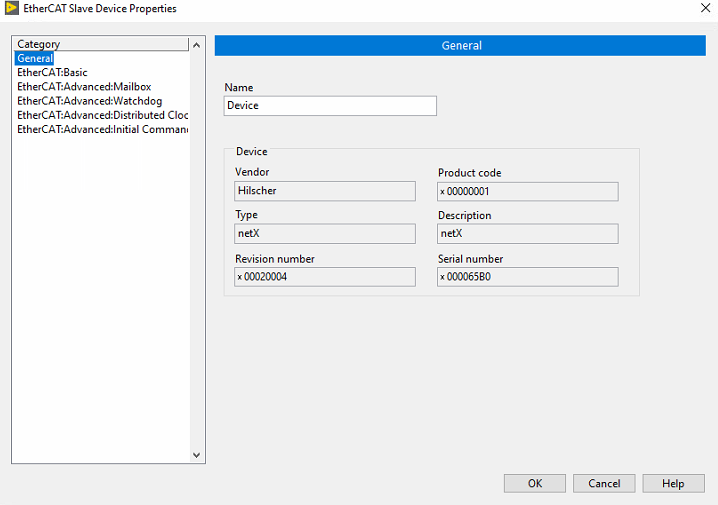
If they match move on, if not, close the LabVIEW project and edit it in text mode to make the revision/serial number match. If by doing this the project marks the new slave as unknown, a new XML must be created with the right revision/serial for the new drive. For doing this, take the existing XML, create a new copy and edit the required parameter to match the one taken from the slave in the Identity Object page.
Once the configuration in the project is okay, the new master configuration can be deployed onto the PXI
Right click on the
MainDrives EtherCAT Masterand select DeployWhen deploying, it si likely that a conflict resolution pop up will appear. Before clicking apply, make sure the conflict solution is set to an option that leaves the scan engine in active as the last step.
Then a progress pop up will appear and if there is no problem while deploying, the new slave should be properly working
Disconnect the LabVIEW project from the PXI
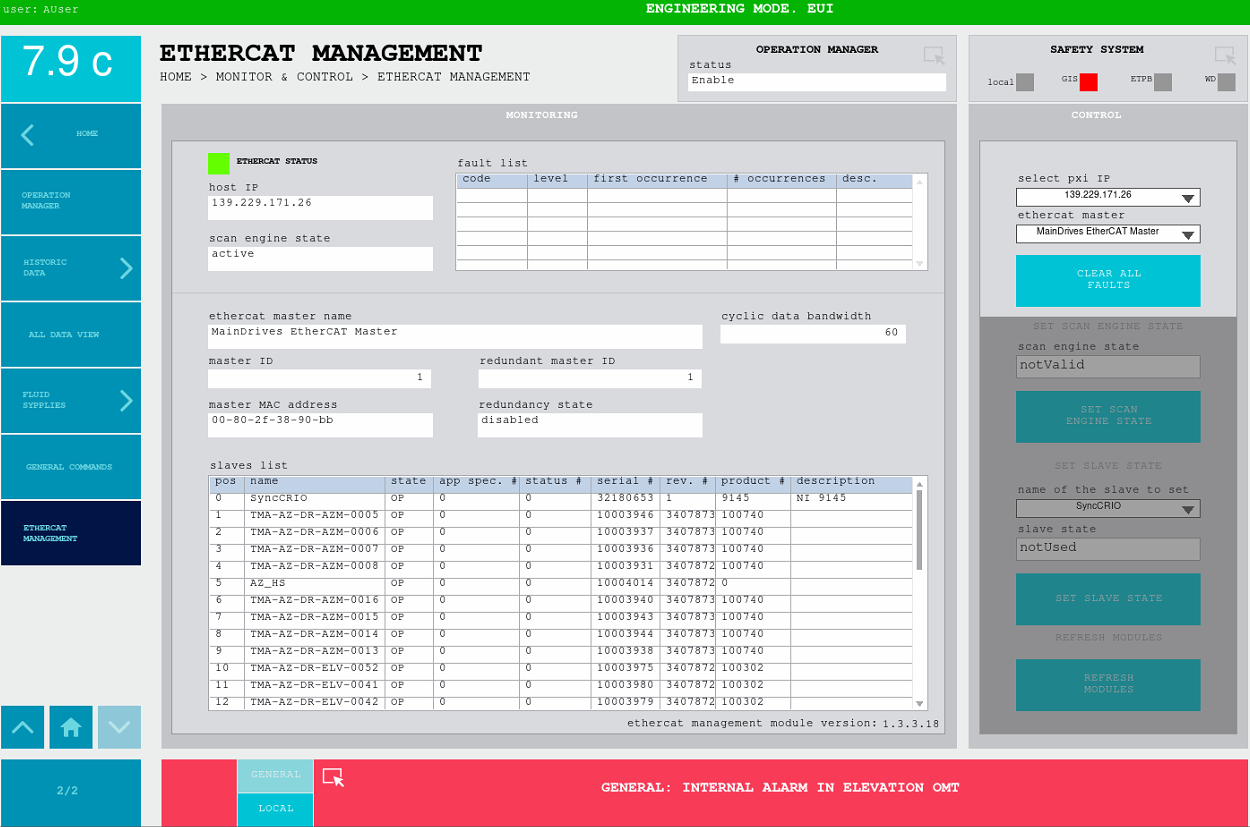
Check the ethercat is running, this can be done from the EUI ethercat management window or from the NI Distributed System Manager
-
Navigate to the corresponding window in the TMA EUI
Check that all the slaves for the AXES PXI are in OP state and that the master is in active state
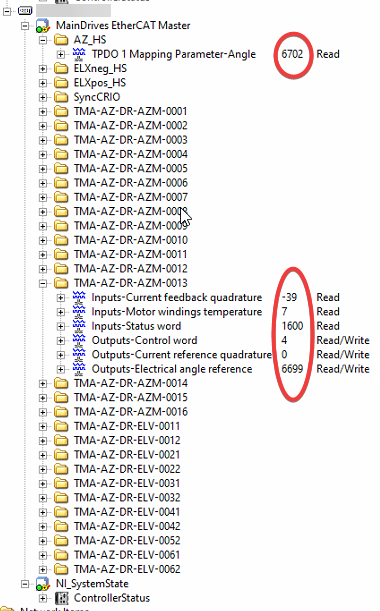
NI Distributed System Manager
launch the app on a windows computer that has access to the TMA AXES PXI
expand the
MainDrives EtherCAT Masterexpand a couple of slaves
check that the variables are being updated
-
7. Final verification
Power on the AZ and EL axis and perform some movements. This should not cause any issue or alarm.
Troubleshooting
Ethercat master deployment error -> LabVIEW: (Hex 0x80DF0002) A file I/O error occurred
This error occurs when for some reason the deployment process gets corrupted.
This can be fixed by removing the .xml files from the PXI, this can be done as follows:
SSH into the AXES PXI
go to the directory where the XML files are stored ->
cd /var/local/natinst/deployfwk/config/remove the XML files ->
rm *.xmlTry deploying the ethercat master from the project again